Hanging A Ladder From The Ceiling | How To
- Storage DIY Projects
- April Wilkerson
- Updated: March 9, 2023
Thinking about hanging a ladder from the ceiling? Check out this DIY project where I show you how to add ladder storage to the ceiling of your garage!
Ladders are handy to have around but can be difficult to store. It’s simple to throw a couple hooks on the wall and store it on it’s side, but then a whole wall is knocked out of use. That is why storing it on the ceiling is the route I wanted to go with the two I have.
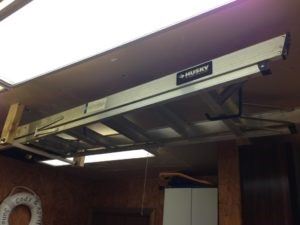
Here are photos of the finished hanging assembly I made.

Handyman put out the above photo where the concept is, you stab one end of the ladder in, then it will roll through until you have enough room to stab the other end. Really simple concept and super functional. Buuut, I have two ladders that flare out at the bottom instead of remaining one length like theirs. Which of course, could be compensated for in the build, but I thought it much simpler (and just as functional) to have a roller bar on one end and a plain ole hook on the other, so that’s what I did.
If you think my set up will work for you, here is the how-to:
What you will need for one holder:
1) I wanted my ladder to be as low profile as possible so instead of making my 2×4 16″ long like Handyman, I measured how deep my ladder was and just added a couple inches to give it room to tilt, and it came out to be 10″ total. So I grabbed a couple scrap 2x4s and cut two of them to length.
2) Next I purchased 3″ right angle brackets and 1/4″x1″ lag bolts then bolted them in place.
Tip: When bolting on the right angle bracket, don’t just guess at where it needs to be. Take a spare piece of wood and butt it up against your 2×4, then put the bracket in it’s place. This way the spare wood is representing where the ceiling will be and the bracket will be sitting flush against the 2×4 and (eventually) the ceiling when all four bolts are in.

The next part calls for 1/2″x2′ threaded rod. Below is a photo, and it is found in the hardware section of Home Depot.
5) Now, before you can put everything together, your 2′ PVC will need to be cut. The hardware and the wood takes up 6″ of the threaded rod, so your PVC only needs to be 18″ long. I used a simple hack saw in order to cut mine to size.
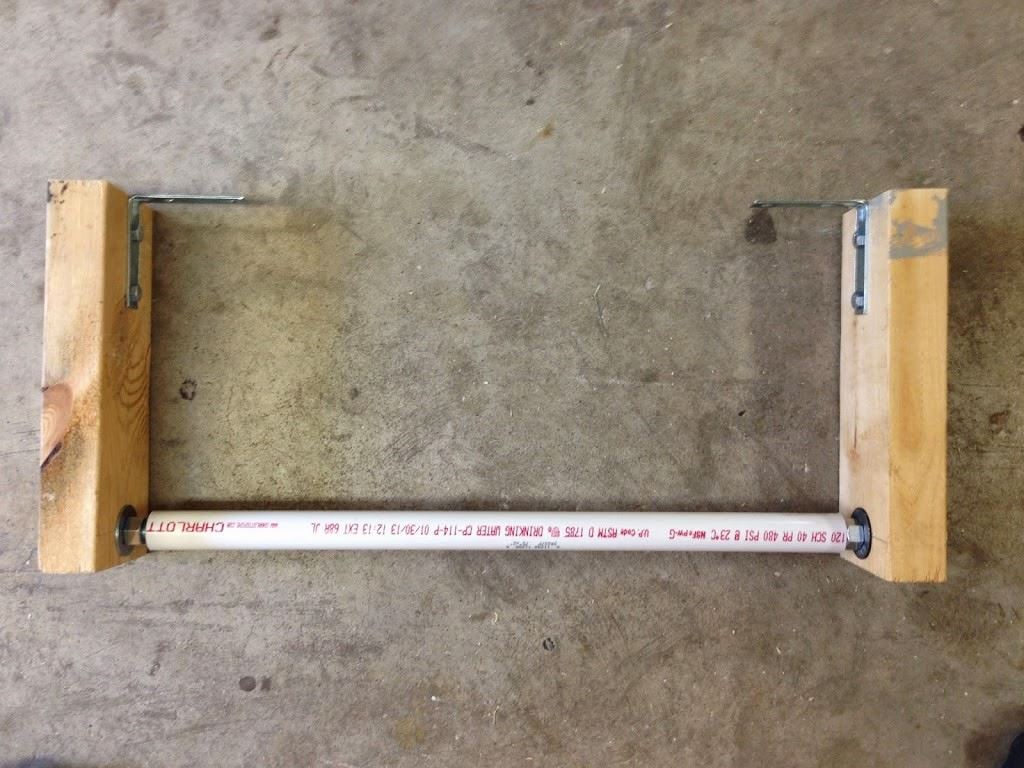
6) Now it’s just time to put everything together. You put the PVC over the threaded rod then put the hardware on both ends then put the rod through the holes of the 2×4, and then put on the remaining set of hardware on. That probably sounds confusing, but it actually isn’t. You need hardware on both the inside and outside of the 2×4 so that you have some way of isolating and holding the wood in place to tighten it down.
The order starting from the left outside going in is: Nut, flat washer, 2×4, flat washer, nut. Then you have your PVC/Rod combo. Then nut, flat washer, 2×4, flat washer, nut.

And now you have a hanging holder…ok that’s a dumb name, but I don’t have anything better. : )
7) Next I located the studs and bolted it onto the ceiling using 1/4″ x 1 1/2″ lag bolts.
8) Then I measured down 4 1/2′ and made a mark for where I would put my hook. Even though my ladder is 6′, I will need some overhanging in the holder so it doesn’t fall, and I wanted my hook to be grabbing on the last step.
Tip: I found these hooks at Home Depot for around $2. In order to put it in, I used a 1/4″ bit to drill a pilot hole then just screwed it in place with my hands.
That lip you see there on the hook keeps the ladder from rolling forward.
Since I also have an 8′ ladder, I just repeated my steps and created a second assembly and utilized more wasted ceiling space!
I know I’m bias, but I think this completely rocks!
**Update** Below is a video showing the build process: