Super Easy DIY Paint Rack
- Workshop DIY Projects
- April Wilkerson
- Updated: March 8, 2023
Thinking about building a DIY paint rack? Check out this easy DIY project where I built my own to store all of my spare spray pain cans on the wall!
Man oh man, I actually finished this project last weekend but have been down with the flu all this week and just now have the strength to sit at a computer and write up the tutorial. Just as a side note: Being sick stinks. : /
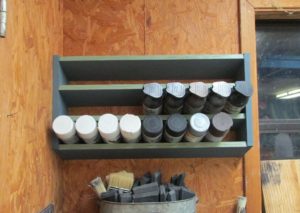
So as you can see, it’s a paint rack. I made it from scraps laying around my shop so it didn’t cost me anything, but will hold up to 27 cans of paint. If I ever need more room then I can just build another one and put it right on top of this one. : ) Not bad huh?

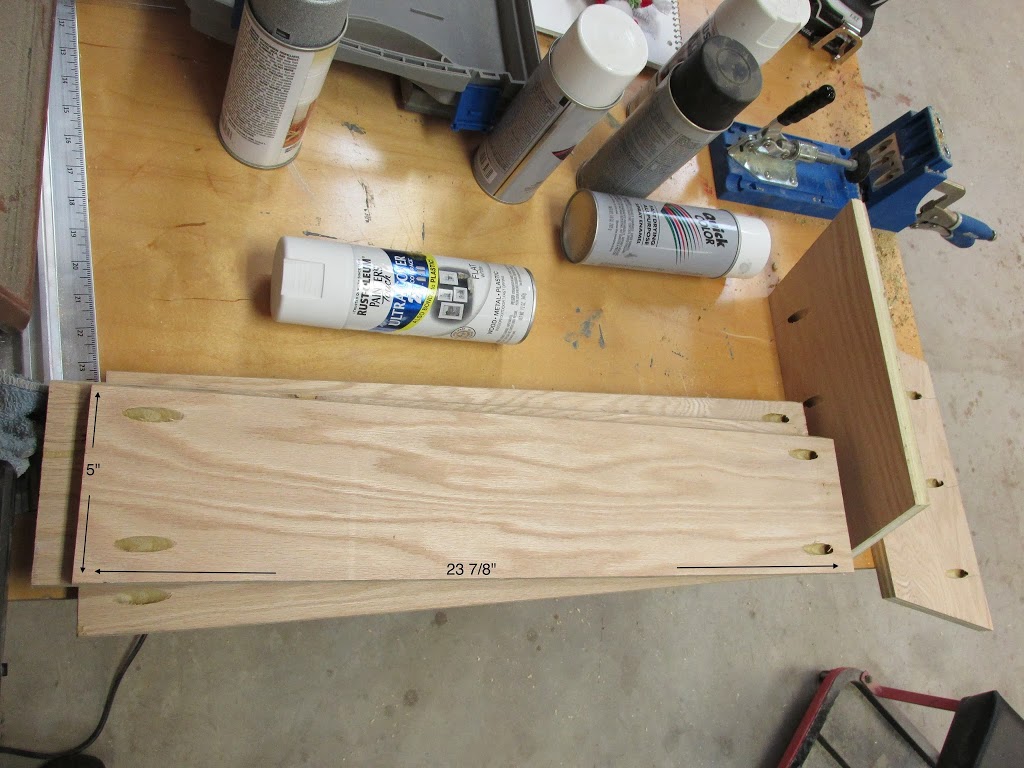
1) The first thing I did was cut my shelves. I wanted my shelves 5″ deep with a 70 degree angle so I set the fence on my table saw at 5″ and turned my blade to 20. I cut the first two shelves from opposite ends first, then set my blade back up straight and ran the remaining piece through to get my last two shelves.
Note: I set it on 20 because when the blade is straight up and down, it is set on 0 and makes a 90 degree cut through the wood. So this means if you want a 70 degree angle cut you need to go 20 off that.
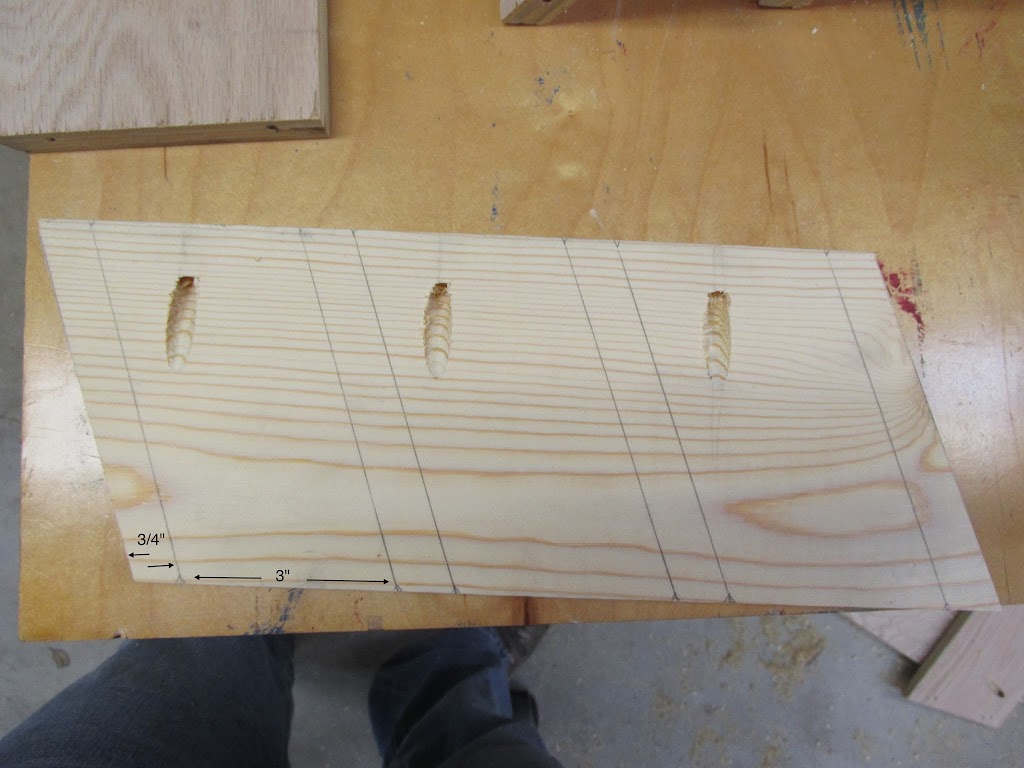
Next was to cut the ends. To figure out the measurement for these I needed to figure out how far apart each shelf was going to be. A can of spray paint is about 2 5/8″ – 2 7/8″ depending on which brand you get. I decided to give each shelf 3″ total. That means I have three gaps at 3″, and four shelves at 3/4″….so my ends need to be 12″ long exactly.
2) I measured out 12″ then set my miter gauge on my table saw to 70 degrees and pushed it through on both ends.
3) Next, I put pockets in everything using my Kreg Pocket Jig. Note: I’m obsessed with my jig and use it for just about everything, but if you don’t have one just use a nail gun to put all the boards together. In fact, even if you have a jig you don’t have to use it because this is a light weight load and brad nails would do just fine.

4) Then I used my tape measure to mark off exactly where each shelf needed to go. I made my marks on both sides then used a straight edge to connect them.

Side Story: My husband is the coolest for letting me raid his tools when needed (like to borrow a swivel socket). I saw an e-card the other day that said “whatever he has is 50% mine, but whatever I have is ALL MINE”. hahaha…I couldn’t help but laugh because I’ve been guilty of having this mentality especially when it concerns my tools.
6) Finally I just picked a spot out then put screws in those pockets on the side and screwed it to the wall.
But then I decided to take it back down and give it some color. : )
Alternative: If you do want yours to have the flat storage on top then you just need to make your sides 3/4″ longer (so 12 3/4″) and cut one additional shelf but make this shelf without any angled cuts. Then once you make the unit like I just outlined above, you can take your extra shelf and line it up flush on the top with the two sides and use a nail gun to attach it in place (by shooting nails in from the side).
Very simple project but also very useful. : )
Alright, I’m going to get back to resting. This flu has thoroughly kicked my butt so I wouldn’t expect any new projects outta me for maybe a week or so.
Total Time: 1.5 hrs
Total Cost $0