Easy DIY Golf Ball Display
- Home Decor DIY Projects
- April Wilkerson
- Updated: March 8, 2023
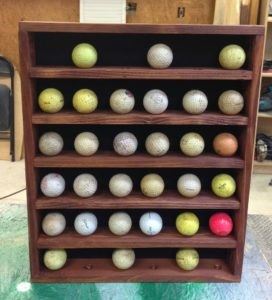
Thinking about building a DIY golf ball display? Check out this DIY project where I built a golf ball display for my dad!
I have been busy making Christmas presents and I wanted to share what I made for my Dad. It didn’t come out as perfect as I was hoping, but I think he will still like it.

A friend gave me a cedar pallet a while back and I have just been storing it. Since I didn’t want to use plywood for this project, I figured it would be perfect for this job.
1) First thing I did was cut up the pallet and sand all the boards down with 100 grit sandpaper.
2) My Mom (hi Mom) (sorry folks, she has been asking for a shout out and moms get what they want around here) took some measurements at their house and told me to make it 18″x15″. So I started off by cutting four strips of 2″ each. Then I cut two boards to 15″, then two to 17″ (since I’m working with 1/2″ wood).
4) Now that I had a direction to go in, I cut 5 boards that were 14″ long, and ran them through my table saw to make them 2″ wide.
5) Then, using a tape measure I found the middle of the board (1″) and drew a line the length of it.
6) Next I placed my marks for where I wanted the balls to be placed. If you want to use the same placements as me, my marks fall at: 1″, 3 3/8″, 6″, 8 1/4″, 10 3/4″, 13″.
7) I stuck the bit in my drill press and set the depth so it would only go in as far as I wanted it to, then started making the divots.
8) Since the bottom board on the frame is also a shelf, I removed the Kreg screws and also made divots in it. Since you get to learn from my experience, don’t put the frame together until you make your divots on the bottom board. ; )
9) Then I spaced my shelves 3″ apart and nailed them in place using 1″ brad nails.
So if I’m being honest, I actually meant to round over those shelves before putting them in place. I got carried away and just kept moving and didn’t realize it until they were installed. Bummer.
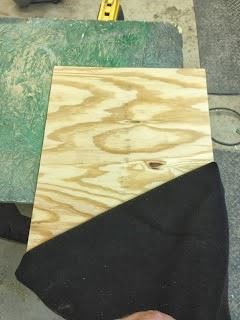
10) Next, I grabbed some 1/4″ wood and cut a piece for the back. Then I also grabbed some black felt and cut it to the same size and glued it on top.

Here is how it will look…..
But! Before you attach the two, you need to stain it first.
11) So next I stained.
12) Then finally I attached the back to the body using 1″ brad nails.
13) The last thing I did was put two picture frame hangers on the back. One on the left corner and one on the right.
I’ll post more pictures after I give it to my Dad and he hangs it up.
Merry Christmas everyone!
Total Time: 4 hrs
Total Cost: $5