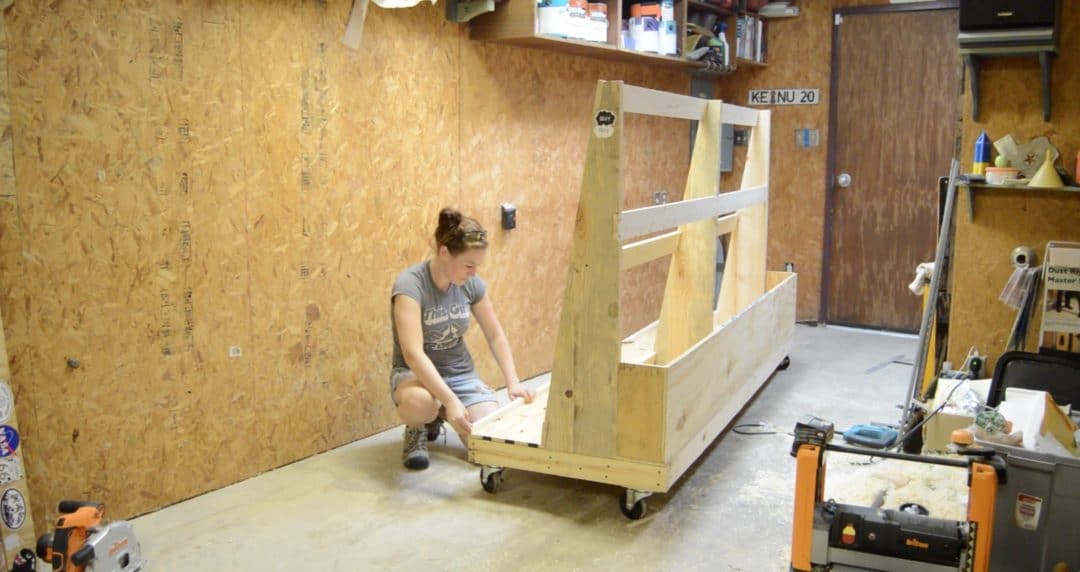
How To Build A DIY Rolling Lumber Rack
- Workshop DIY Projects
- April Wilkerson
- Updated: March 8, 2023
Thinking about building your own DIY rolling lumber rack? Check out this great DIY project for building a lumber rack that you can roll around your shop!
If you are interested in purchasing the plans for this DIY lumber rack you can find them here!
This week I really wanted to take care of the entrance area to my shop. It has been getting more and more out of hand, mainly with wood storage. I have a mobile lumber rack that I built back in 2013 but it is way to small so I decided to build a larger one. I’m sticking with the same concept though of storing the plywood on the back and cutoffs in the front however, I decided to change the orientation of the front storage to vertical.
I am going to make plans for this lumber rack (should be done this evening) so if you would like my material list and dimensions, they will be available in the plans.
Here is a before and after of this area:
(Sorry for the bad lighting)
In this photo you can see how small my previous lumber rack was. I think it’s perfect for a smaller shop or for somebody who only does this as a hobby. However, I have more wood stored around my walls than I can fit on this cart so I knew it was time to upgrade it.
Note: I disassemble this rack in order to reuse the 2×12 columns.
I took two 2x4s to the miter saw and cut them to length.
I also used the miter saw to cut my end pieces however, before attaching them, I needed to cut a half lap so that they could join with the 2×12 columns. So I went to my table saw and swapped out my regular blade for my dado stack. I made beginning and end marks then set my blade depth and started cutting.
Since I reused the columns I don’t have footage on how I made them, but I used my dado stack to cut the half lap at the bottom, then a jigsaw to cut the four cut outs that will later hold the 1x4s. I made three total.
When I was cutting the half lap on the end 2x4s I would test fit them on the 2x12s to make sure I was getting a good fit. You just want to make sure they are flush with each other.
With the half laps cuts I first attached the ends.
Then I came back and attached the two outer columns.
To give more support to the base I cut two additional 2x4s for the center, then also an additional 2×4 for each end. These end pieces are being attached to give the base enough material to later attach the casters.
To make a deck I grabbed a sheet of plywood and cut it down using my tracksaw.
Then I lifted it to a higher surface and used my jigsaw to cut a cutout on either end. This is where the 2x12s will fit.
Once it was in place I located the position of the center column and used my jigsaw to cut it out as well.
Then I went around the perimeter and attached the deck to the base. I also attached it to the 2×4 braces.
With the deck attached, I tilted the rack over so that I could slide in the third and last column. Once I had it in place I attached it like the rest.
Next was to make the cross braces, I used 1x4s and just ripped them down using my table saw.
Then I clamped them in place and attached them with screws.
To make the vertical storage I used the left over plywood to make a front and side then attached it to the base.
I tilted the unit back over to start assembling the casters. I forgot to add a second 2×4 to this center column so I went ahead and did that, then screwed on the casters.
Last thing I added was a lip to the plywood section so that the plywood won’t be slipping out.

Then of course, there is plywood storage on the back.
Total I spent right at $100 to make this. I don’t think that’s bad considering how much it helped organize my shop!
Wanna build your own? I have put together a set of rolling lumber rack plans that walk you through how. It is 15 pages that includes a material list and all the dimensions I used.
If you liked this project and want to stay up to date with what I’m building, then be sure to sign up for my email newsletter and you’ll get an email when I post something new. See you soon!