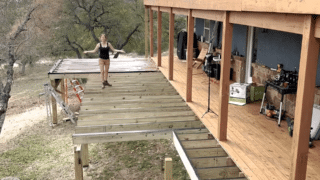
How To Build Your Own DIY Front Porch Steps
- Outdoor DIY Projects
- April Wilkerson
- Updated: March 5, 2023
Thinking about building your own front porch steps? Check out this easy DIY project where I show you I built some, with tips and tricks included!
To begin the staircase job I first needed to remove the old set of stairs that were attached to my dad’s front porch. The demo job went pretty easily with the help of a saws-all and a few large hammers. If you’re interested, I put together a short video on my channel covering this project seen below:
After the demo was out of the way, I then focused on making the stair stringers. The stringers will be made from 2 x 12 treated material. Rather than draw the stair stringer pattern on the 2 x 12 first, I decided to make a template out of piece of quarter inch plywood. This template will be used to create the cut lines for both stair stringers.

After the template was complete I traced the pattern onto my first 2 x 12 and began cutting out the stair stringer. Using a circular saw, I cut all of the lines for the treads and risers. However, I was sure to stop before the intersection of the tread line and riser line. The last little bit of material will be removed with a reciprocating saw.


I used metal brackets made by Swanson Strong Tie to attach my stringers. The front porch needed a little bit of material added to it so that I could secure the stair stringers in the right spot. After the stringers were attached, I then cut all the treads and risers and gave everything a coat of paint. My thought process was that it would be much easier to paint this material before I assemble it rather than paint it later when spaces are hard to get to.
The handrail posts are made from 4 x 4 material and are attached to large concrete blocks at the base of the staircase. Not only do they support the handrail but they also help to locate the bottom stringers and secure them in place. Making sure that these posts are nice and plum, I attached them to the lower staircase stringer using carriage bolts.
Now it’s time to put on the treads and risers. Each one of my treads and risers has a small amount of overhang on the right and left hand side but does not include a nose on the front of the tread. To position this space on the left and right quickly, I simply cut a short block to the same length as the tread and riser overhang. This helps me to simply gauge the overhang very quickly and position on the board without having to measure each overhang.
The treads and risers went pretty quickly. After I was finished with them, I then focused my attention on the handrail. The handrail is made from 2 x 4 material for both the top and bottom of the handrail as well as the balusters.
I started the handrails by first cutting the tops of the post at a 30° angle with my circular saw. This cut can be somewhat tricky so it is important to take your time to cut it correctly so that it is nice and flush on the top.
With the post cut, I’ve then laid the top of the handrail in position and secured it to the front porch post as well as the handrail post at the bottom. I left a lot of overhanging to begin with so I can just cut the handrail to length when I am ready. then I took a measurement for the length of my balusters. Once all of the balusters were cut to length, and the bottom rail also cut to length, I attached the balusters to the bottom rail and then installed that assembly to the handrail.
Doing it this way prevents me from having to secure the balusters from the bottom side while the lower portion of the handrail is already in place. Unfortunately, there just is not a lot of access for a drill when the lower portion of the handrail is in place.
With the balusters complete I could now focus on wrapping up this entire project. The last couple of items only included sealing all of the cracks and screw heads with caulking.
Thankfully, that completes this project. This one for me was short and sweet but it was important for the sake of my dad now having an easier staircase to move up and down before and after his upcoming knee surgery.
Have a great day and happy building!