Installing A Dust Collection System
- Workshop DIY Projects
- April Wilkerson
- Updated: March 4, 2023
First came the AC and now comes the DC! This is another absolute must in the woodworking shop, this week I’m installing a dust collection system.
I am very fortunate to have partner with ClearVue Cyclones for this installment.
ClearVue is a family owned business that is made right here in the US. They just released a brand new metal unit called Pentz EF5. I was excited about this because I wanted to store my unit outside of the shop, under my covered patio, to cut down on the noise inside the shop when it’s running and to also save on the footprint the unit creates inside.
The plan is to have one long main truck running across the north wall of my shop so I can have drop downs to all my larger machines that will require DC. Of course right now I don’t have that many, but I will certainly be adding to my collection in the future.
Now even though I’m housing the unit outside, I’ll be keeping the filter inside so I will have a way to recirculate my heat or cooled air. If the filter were outside then I would be disposing of the air. I’ll get into more details on this later.
To start the process off, we started on constructing the main truck on the floor. I’m going with an 8” main truck line then the down shoots will taper into a 6” line. I worked with ClearVue before hand to figure out where along this back wall my tools will be placed, both my current machines and my future machines such as a jointer. This allowed them to put together a diagram we could work off of and made this part of the process go very quickly.
Of course everything can be moved around in the future should I need to move things around or add additional machines but the main components are the Ys that will create a down shoot from the main truck, blast gates to shut off different sections of the run, and elbows to soften the turns to keep a smooth track for the air to flow along.
For the duct work, you can go with PVC which is what my good friend Jay Bates did and he published a great video covering his install which you can find here. I went with Norfab ducting for mine. It’s more expensive but it’s a reusable system that is not only very quick to install but it’s also extremely customizable. Instead of using adhesives or rivets, the components use a clamping system to join parts together. So we started off by laying out a dry run of an entire branch, once things looked good, we could very quickly start joining things by mating up the two ends inside a circular clamp. All in all I think it took two hours to put all the ducting together and the best part is, if I ever want to change up something in the future all I have to do is unclamp the section I want to modify and change out the component.
With that done, we moved outside to set the motor in place because the placement of this will dictate the position of the main truck line inside. We placed it as high possible because I wanted that main line to be up and out of that highly useable zone on my shop walls.
The unit I’m going with is a 5 horse power cyclone designed by the one and only Bill Pentz. If you aren’t familiar with the name, Mr. Pentz is widely recognized as the leading figure in dust collection technology and he solely works with ClearVue. The EF 5 is a 5 horse power unit with an 16” turbine.
Once the motor is mounted to the cyclone, it is pretty darn heavy. Two people can lift it, but since I went so high with the mounting position we had to bring in the tractor to assist in getting it up to it’s bracket.
While we get that installed let me circle back to having this unit outside. The big pros are the reduction in noise in the shop, and also the lack of an additional footprint. The disadvantage is if you have a heated or cooled space then this giant vacuum will be pulling out that controlled air and disposing of it outside. Which will make keeping your space heated/cooled not only harder, but also more expensive.
The workaround to this is to have the motor outside but have the filter inside so that after the air goes through the cyclone and deposits all the large shavings and chips into the collection barrel, you have the option to route it through the filter and back into the shop. Keeping all that heated or cooled air in the space.
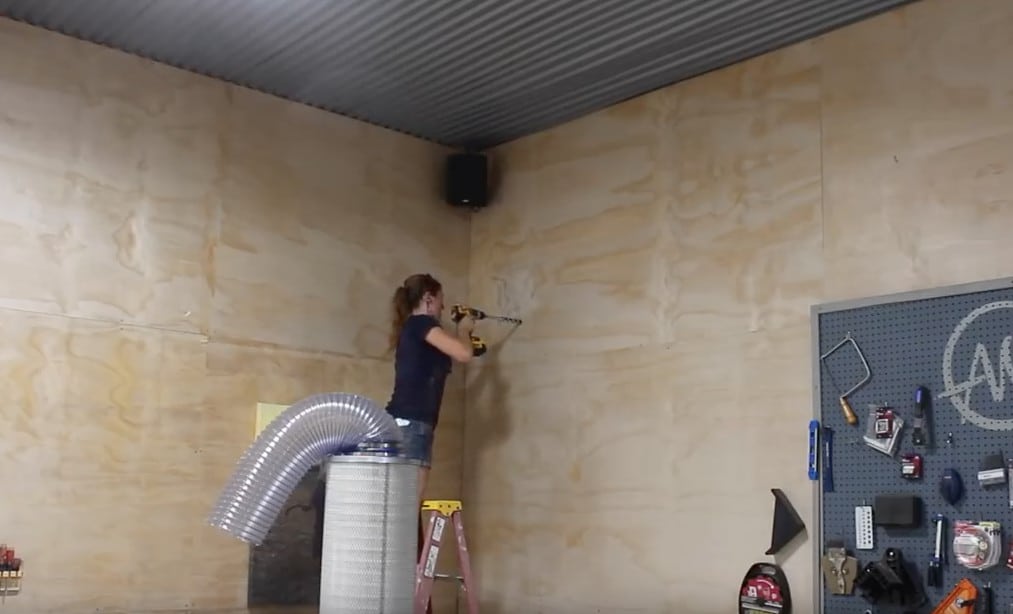
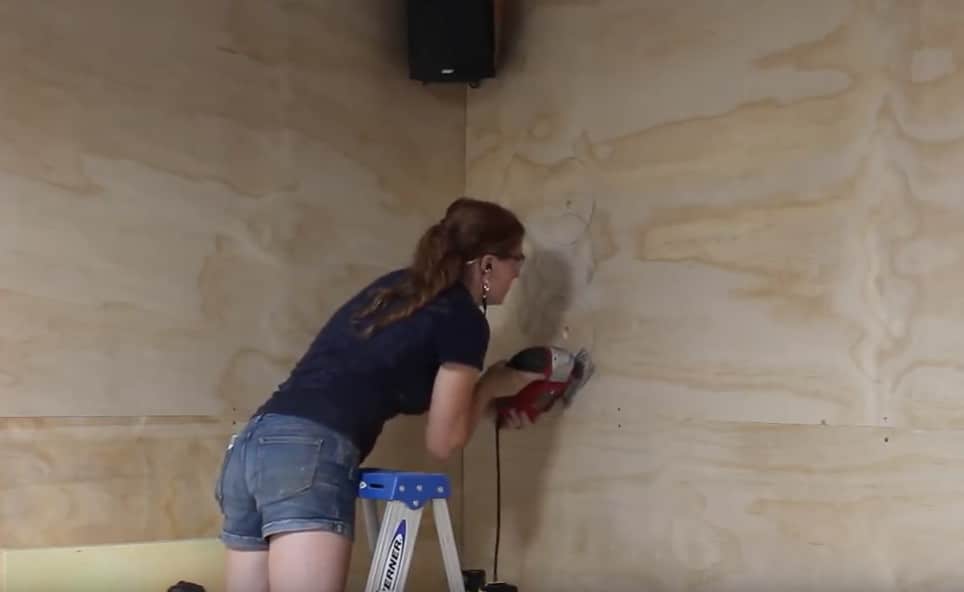
And that’s what we started working on next. Drilling and cutting two holes in my brand new shop wall to route both the intake and exhaust lines.

Incase you’re wondering, yes, it was nerve wracking.
I used a bit long enough to punch through to the outside from the inside. Then I came back with a jigsaw to cut the hole exactly to size.

The top hole will be the intake. So when the DC is turned on, it will pull air and collect sawdust as I’m making it at my machines. It will then come in through the intake of the cyclone where all the heavier particles will drop down into the 55 gallon barrel. Which is hooked up to the bottom of the cyclone. Then the air will be routed to the bottom hole of the shop which leads to the filter inside. This filter goes down to a .5 micron and it’s job is to collect all the fine dust particles that the eye can’t see, before spitting the air back out into the shop.
The guys also included a Y on the exhaust port here to give me the option to vent the fine dust directly outdoors. This way if I’m not running my AC I can switch around the blast gates quickly and vent right outside instead of bringing it back in. And since I’ve been using it for a while now, I can tell you that it works so efficiently that even when I’m venting outside, I don’t see any dust coming out.
Ok lets move back inside and get the ducting hooked up. This goes together very very quickly at this point. Each section is lifted up and it’s best to have three people on this job. One person to clamp it to the previous section, one for stepping the section to the wall with plumbers tape, and one supporting the branch with something like a broom.
And man does it change the look of the shop once it starts going up. I had thought to paint it before installing it but I’m so glad I didn’t, I love the industrial look it gives the space.
The main things to keep in mind when installing these sections is to make sure your blast gates and Y components are facing the correct way. Of course you also want to use a level so it comes out looking sharp in the end. We went through beforehand and made marks so we could quickly throw it up without stopping.
Same thing when clamping on the down shoots, use a level to get them straight and plumb. This particular down shoot is for my future planer and jointer. Since they won’t be in use for some time, we placed an end cap on both.
On the runs that go to a machine with a 4” port instead of 6”, such as this one that goes to my bandsaw, a reducer fitting is put into the line to taper the size down so that a flex hose could be connected with a hose clamp. I did the same exact thing on the line to my bench top thickness planer. Also on this tool, since I’ll want to have the ability to pull it out from the wall to run longer stock through, I made sure to leave myself a good amount of flex hose.
The last run to make was the line to my table saw, which required the trunk to be suspended in the air so that it would stay inline with the main trunk against the wall. I found two trusses to throw in a few hooks, then use some paracord to capture the line and hold it in place.
While I was working with Paul on getting the line up for the tablesaw, Cody was awesome enough to be working with James on handling the electrical for the collector. When I built the shop I planned for this installment and left a dedicated 220 circuit for the motor over in the north east corner. This 220 will be used to run the motor but since I wanted to run the unit with a remote, they also had to tie into a 120 line for that relay.
So Cody removed the wall panel to run the wiring needed, shimmied it back into position, then connected and install the control box. Yet another hole was drilled through this wall to get the power cord to the exterior unit, although this one was muuuuuch smaller.
And for right now, I think that completes my system. Ahhhh isn’t that so cool looking. Cody flipped the breaker, ClearVue gave me the remote and I tested her out. The first thing I did was see how much dust it sucked up off my hands. It worked quiet well.
Next I opened the blast gate leading to the table saw and watch the flex hose as it removes all the sawdust that’s inside my cabinet! Incredible.
I might look into automative blast gates in the future but right now I’m using a longer bar clamp to open and close the second half of my main line depending on if I’m using the bandsaw or tablesaw.
Overall it took, not even a full two days to install everything I’ve shown you. So if you are committed to this hobby, then I recommend making dust collection a priority and protecting those lungs. Big thank you to ClearVue for coming down and supporting what I do.
The guys there were cool enough to give me a 5% off coupon code to pass along to you guys. If you use the code wilkerdos at check out you get 5% off of anything purchased at ClearVueCyclones
Be sure and check out the video above for more of this install.
Thanks for coming along on this one, I hope you enjoyed it. I’ll see you soon.