DIY Large Wooden Tree Art
- Home Decor DIY Projects
- April Wilkerson
- Updated: March 7, 2023
Here is a step by step on how to make large wooden tree wall art for any room. This would be great for a living room or a nursery!
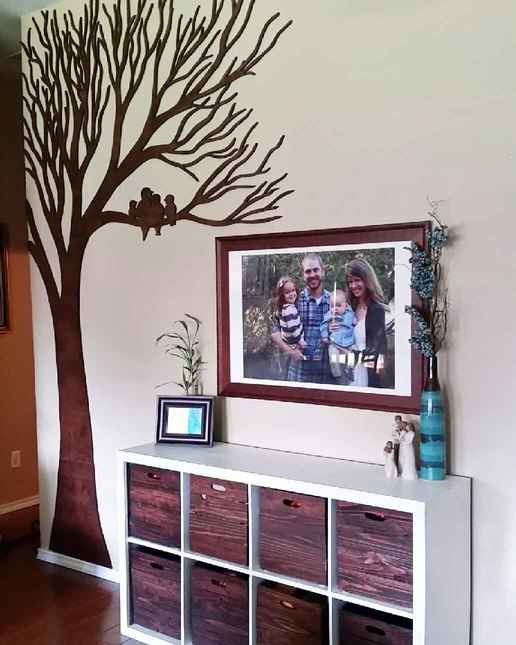
Since I was young I’ve always had a liking for trees. I find them relaxing and soothing so when we bought our house I jumped on the first opportunity to build a tree on a large wall in our living room. And as you might imagine, I love it. However, I took this project on as my very first which was before I was filming my projects. So this week I got a chance to build another one in my friends living room and this time I filmed the process and put together a step by step. This is a super cool project that could be changed very easily to suit different spaces such as nurseries, game rooms, or bed rooms. You primarily need patience, a projector, and a jigsaw. Total, this project is 10 feet tall and took me three days to complete, using two sheets of plywood.

Photo taken by Nicki Morgan: Morgans2day
I purchased two sheet of 1/2″ birch plywood which can be found at Home Depot. Even for my original tree which was 14′ tall, it only took two sheets of plywood….but I would recommend measuring your space before heading to the store to see how much wood you need. Keep in mind that you’ll need to keep the grain orientation running the same way throughout the piece to make it look it’s best.
Check out the video showing an overview of the build process!
The first thing I did was set up a projector and project a tree image on the wall. I found this tree back in 2011 and just held on to it all these years, so I’m not sure who drew it but as soon as I saw it, I fell in love with it.

Once the tree was projected in just the right placement and to the exact size I cut down two sheets of plywood to tack up on the wall (just temporarily). I used a few screws to do this and I didn’t worry about finding a stud, because it’s only in place for a short period of time. Note: Be sure to pick a grain orientation (either vertical or horizontal) and stick with it to get the best looking results.
Once the wood was in place, I started tracing. This process took about two hours I would estimate. After everything was traced, I turned the projector off, took down the wood, and started cutting.

I ended up cutting the canopy into two pieces because I was going to have to haul this to a friends house to install. I used a jigsaw to make all of my cuts and I made sure to put my blade setting (on the jigsaw) to the ‘zero’ setting to prevent a lot of tear out.


Total it took me around 4 1/2 – 5 hours to cut both pieces out.


For the small pieces like the birds I used my SuperJaws to hold the pieces in place while I cut out the details. You could also use a vise or clamps.

With everything cut out I gave everything a good sanding then starting applying a finish. I used a stain color called Carrington and applied it with a foam brush.

After a coat of stain I applied three coats of water based poly.
To install it on the wall I would first use some all purpose adhesive on the back then set the piece in place and use a few brad nails to tack it down. I started with the bottom then worked my way up.

And that’s it! If you want to do a similar project I really encourage you to get creative, I think this method would work great with tons of other ideas like animals, under water themed, boats/airplanes….just about anything really! It really fun to go big but the bigger you go, the more patience it takes so take your time and enjoy the process!
Big thank you to Nicki Morgan for the beautiful photo! Check out Nicki here: Morgans2day
If you liked this project and want to stay up to date with what I’m building, then be sure to sign up for my email newsletter and you’ll get an email when I post something new. See you soon!
*Disclosure: Some links in this post are affiliate links meaning, I may get a commission if you make a purchase. Thanks for your support in this way!