How To Build A Leaning Wall Shelf
- Home Decor DIY Projects
- April Wilkerson
- Updated: March 5, 2023
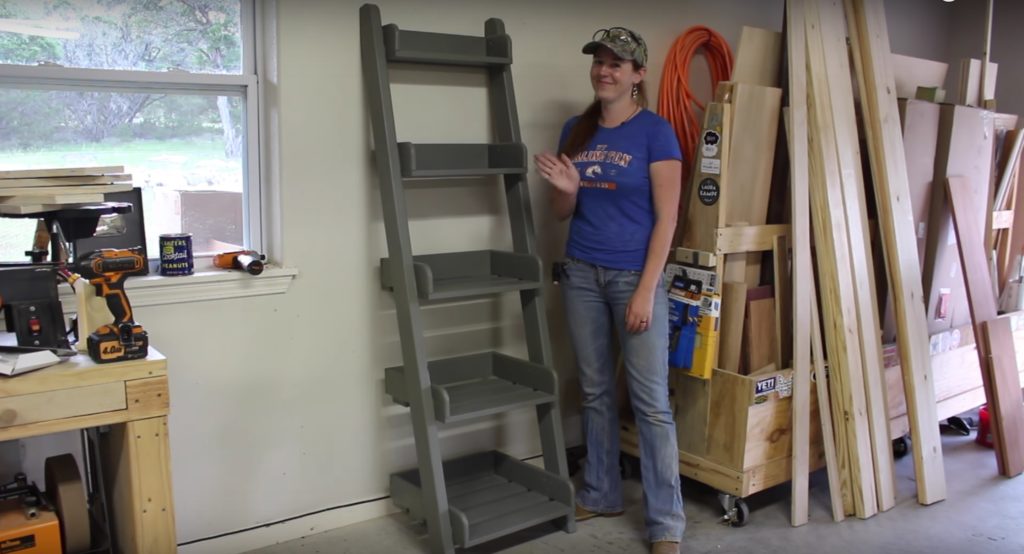
Thinking about building your own DIY leaning wall shelf? I think this design is simple yet functional and just looks interesting the way that it only uses two legs and the wall for stability.
I started the project by first developing a cad model in sketch up.

From there I was able to generate a cut list which saves a lot of time when going to the hardware store to buy material.
Blue Tooth Hearing Protection
Miter Saw
Miter Saw Stand
Sketchup Design Software
Bandsaw
Belt Sander
Router
Router Table
Push Blocks
Drills
Right Angle Jigs
3″ Clamps
Glue Bot
Silicone Glue Brush
Rockler Stool
Joint Compound
If you’re interested, the drawing plans with a cut list and shopping list can be found DIY leaning wall shelves plan here. This is one of those lite projects that can be completed with very little tools – feel free to jump in : )
I built all of the shelves first. I started by cutting all of the bottom and back slats then moved to cutting the sides of the shelves. I made these cuts using a miter saw but you can use a jig saw or a circular saw if you do not own a miter saw.
I rounded over the front corner of the shelf just to soften up the appearance a bit. To make the radius for the corner, I simply traced a section of a masking tape roll at the corner of the side pieces, then trimmed it off using a band saw. A jig saw would work perfectly if you do not own a band saw.
Lastly, I touched up all the edges using a router and a sander. Again, sand paper and a sanding block would work just fine if that’s all you have access to.
Time to joint the pieces together. I’m basically making an open top box. I started by using a 90° jig and clamped the back and side pieces together. After pre-drilling the holes, I used wood screws to attach the material together. Also, I recommend using wood glue at every joint to not only stiffen the joint but to also prevent the assembly from squeaking.
Once the two sides were joined to the back, I turned the shelf over and began attaching the bottom slats. I used the same method here, pre-drilling each screw hole then using wood screws to attach the slats to the bottom of the side pieces.
I decided to cut a small spacer so that the spacing between each slat would come out equal on every shelf. Admittedly, these things went pretty fast.
Cutting the legs is pretty straight-forward as well. I used the same roll of tape to round off the front corner and then used a speed square to make an angled cut on the bottom and the top of the leg.
The two angled cuts allow the entire unit to rest against the wall and the floor nice and flat-like rather than on a the sharp corner of an uncut 2×4. I’ll admit that a bit of care needs to be taken when cutting the angles since you need them to rest flat on the wall and the floor respectively, while at the same time, keeping the shelves level. Of course all the numbers and details are covered in the PLANS. Feel free to check ‘em out!
To finish up the legs, I filled in small imperfections with joint compound, and then sanded it down after the compound dried. Finally, everything got a coat of paint.
I was sure to NOT paint the surfaces of the shelves and the legs that would be mating up to one another. This is because the paint will keep the glue from working correctly when legs are joined to the shelves.
To attach the shelves to the legs I started with the bottom most shelf. I placed a couple of 2×4’s under each side to act as spacers so that it was nice and level off the concrete floor. Then, I simply scooted the legs in position on the sides of the bottom shelf, made sure everything was nice and square to one another, then glued and screwed the legs to the first shelf.
The remaining shelves pretty much went the same way. The one thing to keep in mind is that the back of the shelf is spaced about ½” off of the wall and you will need to be sure each shelf is completely level before driving in the screws. The last bit only calls for some finishing painting and that’s pretty well it!

If you’re interested, I have finished up a set of plans found DIY ladder shelf plans here that walks through all of the nitty gritty details and dimensions. Feel free to check the out : ) This has been a really fun, simple, and inexpensive little project and will definitely serve a good purpose in the new bathroom space.
Thanks for stopping by – April